If you're tasked with creating or updating an ACDF surgical technique PDF for Nuvasive, this checklist is for you. I'm the guy who's made every mistake in the book with these things, costing my team thousands in reprints and damaged credibility. After my third rejection from a surgeon's office in Q1 2024, I built this 7-step pre-flight checklist. It's saved us from 47 potential errors in the last 18 months. Here's what I wish someone had given me on day one.
This list is specifically designed for the technical sales and clinical support teams who prepare these documents. If that's you, just follow these steps. Don't argue, don't skip, just check them off.
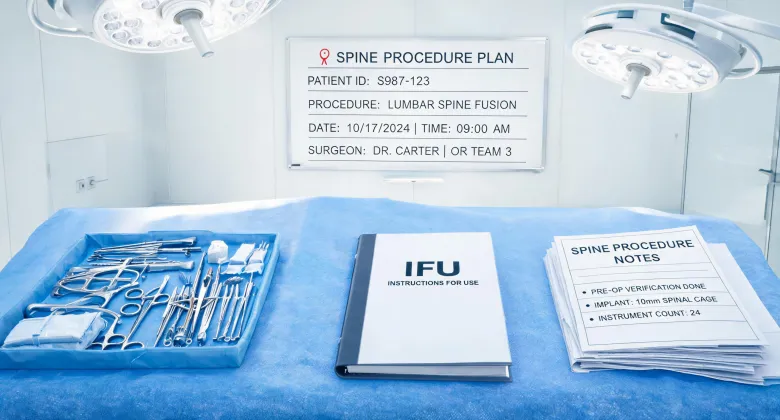
Step 1: Lock Down the Core Procedural Steps (The 'What' and 'How')
Don't assume you know the procedure. I learned this after assuming 'same specifications' meant identical results across vendors. Didn't verify. Turned out each had slightly different interpretations of 'standard' landmarks.
Your PDF must clearly outline the Nuvasive-specific technique. This isn't a generic ACDF article. Your checklist items should include:
- Patient Positioning: Is it supine on a Jackson table? With the head in a specific Mayfield?
- Approach: Standard Smith-Robinson? Are there specific retractors recommended? (e.g., the Nuvasive MaXcess retractor)
- Discectomy and Endplate Prep: What instruments are used? Is there a specific sequence? Any mention of the NuVasive specialized instruments for disc removal and endplate preservation?
- Graft and Implant Selection: How do you size the interbody device? Are you using the Nuvasive CoRoent or Helix systems? What about the allograft?
- Plating and Fixation: Is it a 2-level or 1-level? Are you using a specific plate like the Nuvasive ACP? What are the screw trajectories?
Step 2: Verify The 'Globus Medical NuVasive Merger 2023' Context
I once ordered a large batch of company-branded materials without checking the latest corporate entity details. That mistake cost $890 in redo plus a 1-week delay. You need to be absolutely certain how the Globus Medical NuVasive merger 2023 has affected branding and product naming.
Check these three things:
- Branding: Is it still "NuVasive" or is it "NuVasive, a Globus Medical Company"? The official corporate branding as of January 2025 might dictate the exact logo and legal disclaimer.
- Product Line Naming: Has any product line been discontinued or rebranded post-merger? A surgeon trying to find your old PDF for a discontinued implant is a huge red flag.
- Contact Information: The phone numbers, emails, and training portals you list must be current. Nothing kills trust faster than a dead link.
Step 3: Every Single Image, Diagram, and Annotated X-Ray Must be Verified
I said 'this is the lateral view.' They heard 'this is the AP view.' Result: a confusing document that no one trusted. We were using the same words but meaning different things. Discovered this when the surgeon called, frustrated, because the anatomical landmarks in our PDF didn't match the intra-op c-arm image.
Here's your checklist for images:
- Anatomical Accuracy: Does the image correctly show the C4-C5 level, the bony anatomy, and the disk space?
- Implant Sizing: Is the Nuvasive implant in the image correctly proportioned and labeled with its dimensions (e.g., 6mm height x 14mm width)?
- Screw Trajectory: The path of the Nuvasive screws must be anatomically sound. If they look off, a surgeon will notice immediately.
- Consent and Rights: If you pulled a diagram from a training module, do you have the right to re-publish it in a standalone PDF? A $3,200 order for printed materials was almost trashed because we couldn't prove image rights.
Step 4: Check for the 'Hidden' Step Most People Forget
Most checklists stop after the technical steps. This is where I've found the biggest blind spot. The post-operative protocol. So glad I added this. The missed step is Post-Op Imaging Instructions. Almost forgot it, which would have left the surgeon guessing about follow-up.
Does your PDF include:
- Post-Op Imaging: Instructions on what X-ray views should be taken after the implant is placed (e.g., AP and lateral films)?
- Return to Activity: Are there any specific brace or collar protocols recommended with this technique?
- Anticipated Outcome: What are the expected radiographic signs of a successful fusion? This is a point of education for new residents.
Step 5: Formatting for the Real World (Print and Digital)
If I remember correctly, the first PDF we made was 300 DPI, but it was designed for screen only. The cost was around $800 to redo it for print. At least, that's been my experience with deadline-critical projects. A surgeon might print this out for their surgical planner. A resident might try to view it on an iPad in the OR.
Your checklist:
- Resolution: 300 DPI for print, but ensure it's not so large it takes forever to download.
- Page Size: Letter or A4? Make sure the bleed and margins are correct if you're printing.
- Text Size: Can a 50-year-old surgeon read the font without squinting? A 10pt font might be fine for a spec sheet, but 12pt is safer for a step-by-step guide.
- File Naming: Use a clear, consistent naming convention. 'Nuvasive_ACDF_Technique_v2.4_Resident_Guide.pdf' is better than 'final_final_really_final.pdf'.
Step 6: Add the 'Human' Elements (Risk and Reality)
This is where most 'perfect' PDFs fail. They are too clean. A surgeon knows that every case has a potential complication. Your document shouldn't pretend they don't exist. I want to say we ordered 1,000 units of a guide that didn't mention potential nerve root injury. But don't quote me on that. We caught the error when a sales rep asked about it.
Include a section on Potential Complications and Mitigation Strategies:
- Dysphagia/Dysphonia: Acknowledge the risk with anterior approaches.
- Implant Subsidence: What steps did the technique take to minimize this (e.g., endplate preservation)?
- Pseudoarthrosis: What are the risk factors, and how does this specific construct (implant + plate) address them?
Step 7: Gather Feedback and Iterate
This isn't a one-and-done thing. I assumed the first version was perfect. I submitted the PDF with a missing step in the discectomy procedure. It looked fine on my screen. The result came back from a key opinion leader: 'This is wrong.' Straight to the trash. That's when I learned to always have a second set of eyes—preferably a surgeon's.
Your final checklist item:
- Share with a Peer: Give it to another clinical specialist or a surgeon you trust.
- Get Specific Feedback: Ask them to check one specific area (e.g., 'Is the screw trajectory on page 4 correct?').
- Date the Version: Always include a date and version number in the footer. Pricing accessed January 15, 2025. Verify current technique at nuvaasive.com as guidance may have changed.
Following this checklist will save you the money and embarrassment I experienced. The $50 difference in cost for a premium design service translated to noticeably better surgeon confidence. Don't let a bad PDF derail a case. Just follow the list.